Open Google Lens in Chrome (The Easiest Way in 2025)
In this tutorial, we will show you exactly how to open Google lens in Chrome. Simply follow the steps below.

How to Open Google Lens in Google Chrome
Follow the steps below to open and use Google Lens in Chrome.
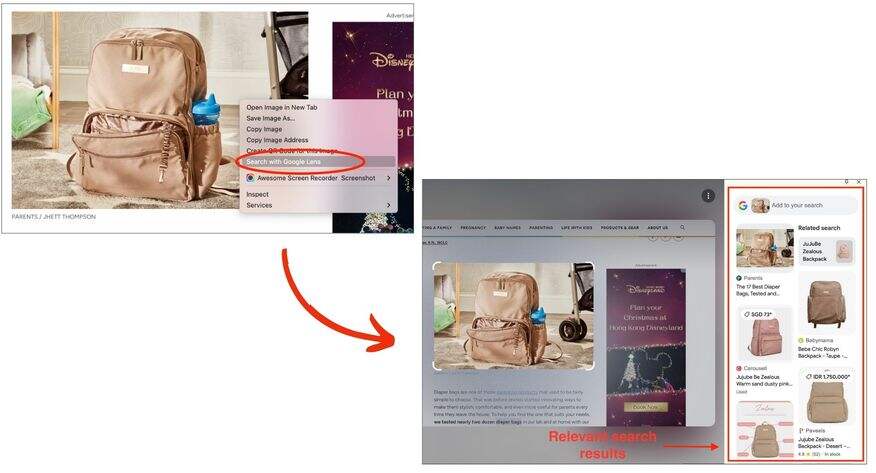
1. Use Google Lens by the Right-Clicking
On any image within a webpage that you’d like to search for, “right-click” on it. In the context menu that appears, click the “Search with Google Lens” option. This allows Google to analyze the image and retrieve relevant search results in a new tab or sidebar.
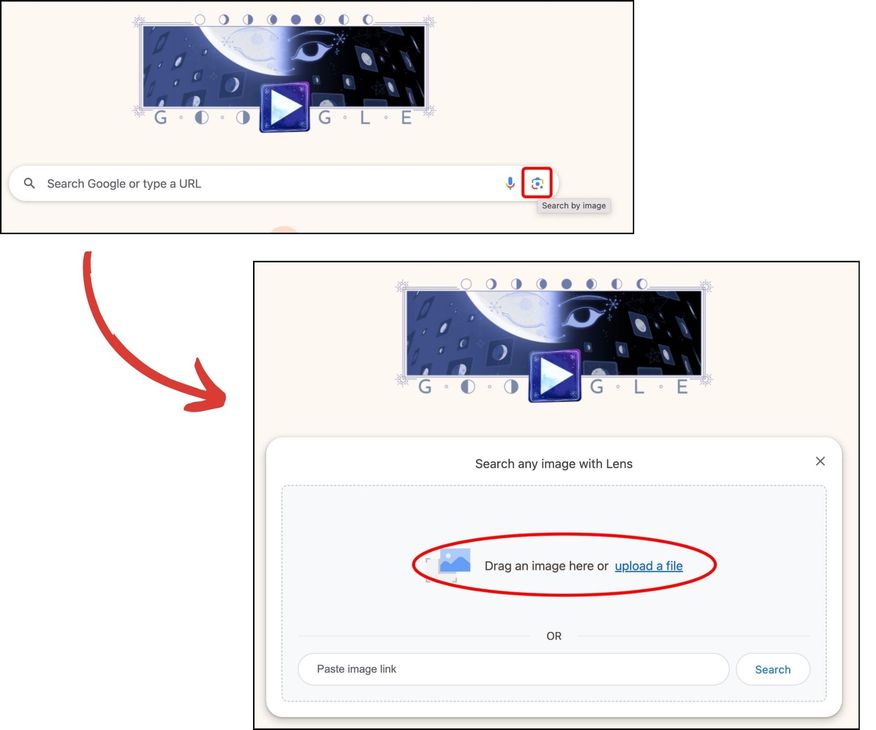
2. Drop Images on Google Lens
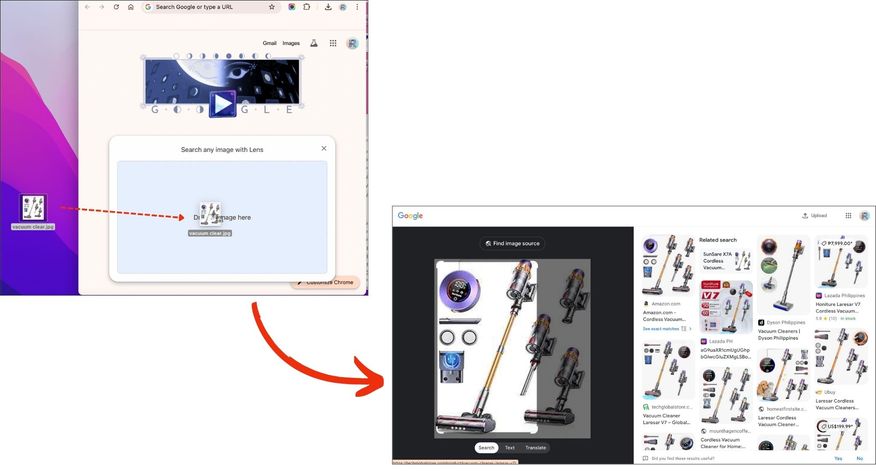
Click the “Google Lens” icon in the search bar on your homepage. A drop down menu will appear, “drag or upload” the image you want to search.
By uploading or dragging the image, Google lens will process it and provide you with a range of results based on its analysis.
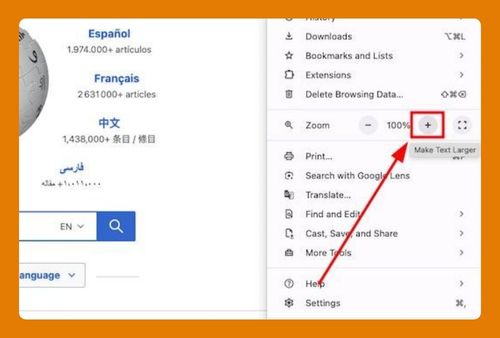
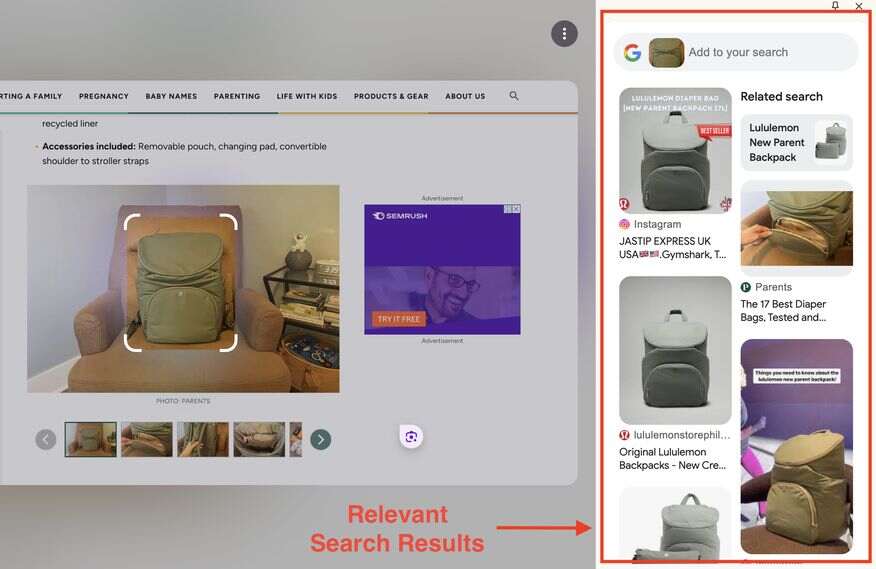
3. Using Google Lens from Chrome’s URL Bar
Click on the URL bar at the top of your screen, and the “Google lens” icon will appear. Click the icon to begin a visual search.
Your mouse pointer will turn into a “drag pointer”, allowing you to highlight the specific area or object you want to search within the webpage.

Google Lens will open a side panel and start analyzing the image. Results will appear on the right side of your browser, offering details and links related to the visual content.
We hope that you now have a better understanding of how to open and utilize Google Lens in Chrome. If you enjoyed this article, you might also like our articles on how to stop PDF from automatically opening after its download in Chrome and how to open EML files in Chrome.